
Solving My TP-Link Deco Nightmare
A year ago I decided that I needed a WiFi mesh network, and settled on the TP-Link Deco system as something that would satisfy my needs. Unfortunately it’s taken me a year to get my network functioning properly.
The hardware TP-Link provides seems reasonable, and their software is no worse than that of an average networking company, but their customer support is absolutely dire. And computer networking is so overloaded with technical knowledge requirements that the average person can’t really understand what is going wrong when their network fails.
To save other people in my position a bit of time, I thought I would provide a write-up explaining how I managed to finally get my home network functioning.
Background
Here is what I have in my setup:
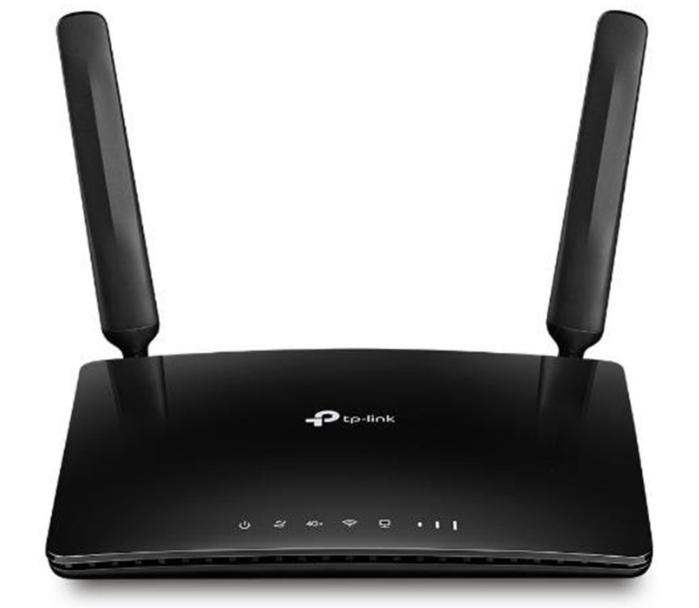
- A TP-Link Archer MR600 4G+ v2 modem and router
- Five Deco M9 Plus units
- Two Deco M4 units
- A lot of mobile phones, tables, a PS4, some laptops, a network printer, and a couple of desktop computers, that their owners want to be able to connect to the Internet over the network.
Initially I was using a Huawei B315 4G modem, which did not have an option anywhere to enable bridging mode, so I was using the Deco network in “Access Point” mode, rather than “Wireless Router” mode. This means all sorts of functionality was unavailable — no firewall, no anti-virus, no quality of service settings.
And furthermore, the network was extremely unreliable. Sometimes pinging outside addresses took 35ms, other times it was 1000s of seconds, and sometimes I couldn’t reach the outside world at all.
So I bought a recent TP-Link 4G modem, thinking that of course they’d have designed it with Deco compatibility.
TLDR;
Ditch the TP-Link Archer MR600 4G+ v2 modem.
I may have ended up with a defective one, but there are plenty of people posting that they have the same problem I saw — the modem limps along, sometimes functioning okay for a while, at other times working okay if you reboot it every hour.
I bought a cheap TP MR150, which is now functioning fine after a week of use. I’ll update this article if it goes wrong too. However, the rest of the article tells you how to configure it with a Deco mesh setup so you can get access to all the extra functionality that running it in Wireless Router rather than Access Point mode.
And as an added bonus I provide an explanation of how the internet works with a simple analogy.
The Problems
As I briefly mentioned, main problem I had was that the performance of the network oscillated wildly. One hour everything seemed to function fine, and the next hour DNS lookups took up to a minute, ping times were several seconds with half the packets getting lost, and the hour after that there was no internet connectivity at all, except for streaming videos that had been started earlier.
The second problem I had was that the Deco network was supposed to be able to offer all sorts of services: anti-virus protection, a firewall, performance monitoring, quality of service selection, and so on. Except that these all required a modem in “bridging mode”, and despite the fact that we’re talking about all the equipment being TP-Link manufactured, there was no “bridging mode”option for the MR150.
The Solution
If you follow these steps, you should end up with a Deco network in “Wireless Router” mode with a decent connection. It took me three days to find all the required information:
Setting up the Archer MR150 to bridging mode
There is no actual clear “bridging mode” for the MR150, but you can configure all sorts of settings that ensure that it acts like it is in bridging mode by following these instructions:
- Follow the instructions for setting up your Archer MR150: insert a SIM card, power up the modem, and connect your laptop to the modem using an ethernet cable.
- Go to 192.168.1.1 with a web browser, and follow the setup instructions.
- Check that everything is working using the Advanced tab, scrolling down to System Tools, and selecting Diagnostic Tools. The Sim card test, WAN connect test, and NCSI tests should all pass (if they don’t, your mobile internet provider has a problem). This Diagnostic Tool and the website www.speedtest.net provide an excellent combination to check how well things are going once your network functions.
- On the Advanced tab, go to Wireless and select Wireless Settings. Uncheck Enable Wireless Radio on both the 2.4GHz and 5GHz panes (you can leave this checked if you also want to use your Archer MR150 as a separate WiFi network to your Deco system).
- On the Advanced tab, go to Network and select LAN settings. Enable IGMP Snooping — this seems to solve the problem with DNS lookups sometimes failing, but I have no idea why — and make sure DHCP is checked. Both of these choices sound odd initially, but they are required. Then click the Save button.
- Connect your master Deco unit to the Archer MR150, and wait for it to get an IP address. It should end up with 192.168.1.100 or 192.168.1.101, and on refreshing the LAN Settings page, you should see it in the client list.
- Verify that it is indeed the master Deco unit by comparing the MAC address on the back of the Deco with the MAC address in the LAN Setting’s Client List.
- Click the blue “+ Add” button in the Address Reservation table, and then click the Scan button. Select your master Deco unit from the drop-down list, and Save it to the list of reserved addresses.
- On the Advanced tab, go to NAT Forwarding, and select DMZ. Check Enable, and add the IP address of your master Deco unit to the DMZ Host IP Address field. Its the 192.168.1.100 or 192.168.1.101 address that you set in step 6 that you need to be entering here.
- For good measure, reboot your 4G modem using Advanced tab > System Tools > Reboot.

Setting up the Deco network
- Go to the Deco android app, which should now connect after a bit of a wait. On the main screen, at the bottom right, there is an icon with a grid of nine squares and the word “More” beneath it. Tap on it.
- Tap on the cog icon with “Advanced” beneath it. Scroll all the way down, and check that Operation Mode is “Wireless Router”. If it is, great. If it isn’t, tap on Operation Mode and select “Wireless Router” instead of “Access Point”.
- That’s it. You can now follow the normal installation procedure to add more Deco units to your mesh network.
A Primer on Networking
At this point you can stop reading, because your network should be up and running now. However, if you’ve been stumbling around in the dark, wondering what all the networking terminology is about, you may find the following useful:
Networking: an analogy
Imagine that a device on a computer network is like a house on a street. You can specify it using it’s map co-ordinates. For example: 38.8977°N, 77.0365°W lets you know the location of a famous building. These co-ordinates are like the MAC address of the house, except instead of being a longitude and a latitude, a MAC address looks like 74:DA:88:3A:F0:21. It is the lowest level form of address of the device.
One level up, we have the IP (or Internet Protocol) address. The IP address is like a super-accurate Zip code, for example with our house analogy, it’s something like DC 20500. But an IP address isn’t written like a Zip code — there are actually two different standards in use: IP4 and IP6. Here I’ll talk about IP4. And IP4 address looks like a collection of four numbers separated by periods, for example 192.168.1.100.
Computers use IP address on the Internet to find and communicate with each other. But human beings aren’t very good at memorizing them, so we invented the Domain Name Service, which associates a memorable human-readable string with each public IP address. Continuing our analogy, the DNS name is like a street address. For example, the street address of our house is The White House 1600 Pennsylvania Avenue NW Washington, and the DNS address of the same location in the Internet world is https://whitehouse.gov.
Local and public networks
There is a shortage of IP4 address in the world. As a result, people use private addresses for their local networks, with a gateway to the Internet. The gateway device has single public address facing out to the world, and a local network address on the local network. Local network addresses are usually either of the form 192.168.x.x, or 10.x.x.x. So if one device called 192.168.1.100 wants to talk to another device called 192.168.1.119, they know they’re both on the same internal network, and they communicate directly. But if 192.168.0.100 wants to talk to a device with IP address 23.197.12.199, it notices that that device isn’t on the local network.
So it sends its messages to the gateway (which is typically called 192.168.1.1), and the gateway then forwards it out to the world to find the device.
This makes your local network look like an office building — when messages are sent to the office’s address, they arrive at the mail room (which is like the gateway), and the mail room works out which particular room the letter should be delivered to.
Dynamic Host Configuration Protocol
The Dynamic Host Configuration Protocol, or DHCP for short, is a further complication in networks that was introduced to make things easier and yet seems to result in many problems and headaches.
In our analogy, DHCP is equivalent to “hot desking” in an office. Rather than getting a nice private room which you can decorate with all your personal knickknacks, on arriving at work you are given a desk location each day by the receptionist. Sometimes it’s the same desk, and sometimes it’s a different desk.
The same happens with DHCP — when a device connects to the local area network, it is given an IP address by the DHCP server, which may or may not be the same address it had last time.
Problems arise when there is more than one DHCP server on the network, which can result in two different devices getting the same IP address. This is like two receptionists handing out hot desk locations, resulting in employees arguing about which one of them is actually supposed to have a given desk.
Network address translation
Back to the mail room, which is performing “network address translation” — they keep track of all the outgoing letters, and when a reply to a letter arrives at “the White House”, they inspect it, and determine which room it should be delivered to.
Continuing with the mail room analogy, we have two mail rooms in our system! The TP-Link Archer MR150 is acting like a mail room, and the master Deco unit is working like a mail room too! This causes a problem, because both think they are the most important room in the office, and they start stepping on each other’s toes, and letters get lost.
To overcome this, one of the mail rooms has to be set to “bridging mode”.
What is Bridging Mode?
When a gateway device is set to bridging mode, it directs all the stuff it receives to one place, and becomes like the receptionist who takes all the letters he gets straight from reception to the mail room, instead of walking around the office delivering them, and annoying the mail staff. That’s what we wanted to do with our MR150 4G modem.
But there isn’t a setting in the modem conveniently labelled “bridging mode”.
Instead we fake it by using a DMZ.
What is a DMZ?
DMZ stands for “Demilitarized Zone”, and in the networking world it means that all the protective code that the modem manufacturers use is turned off for devices attached to it. It’s like a separate wild west network attached to your modem. No modem firewall, no network address translation, no nothing. Just all the data passing straight through from the internet to the DMZ.
Which as it turns out, is exactly what we want for the Deco network.
Why TP-Link couldn’t just package all the above steps into a simple “Bridging mode” setting rather than requiring us to go through all the rigmarole of setting it up ourselves is beyond me.
Then again, they’re a big company, with over 20,000 employees. I guess that makes them too large for efficient intercommunication or listening to their customers.
About the Author

Keir Finlow-Bates is a blockchain researcher, inventor, and author.
You can buy a copy of his book, “Move Over Brokers Here Comes The Blockchain” which explains blockchain in simple terms using analogies, just like the one used above, at http://mybook.to/moveover.
He wishes that access points, switches, routers and devices just worked out of the box.
